Sweet Potato Casserole (Like Ruth’s Chris)

This sweet potato casserole came from Ruth’s Chris but I tweaked it to fit what I wanted for Thanksgiving dinner this year which was something not overly sweet.

sweet potato casserole

Casserole:

5 large sweet potatoes
1/3 white sugar (original dish has 1 cup but IMO it’s sooooo unnecessary.)
2 well beaten eggs
1/2 tsp salt
1 tsp Watkins vanilla extract
1/3 cup lightly salted butter, melted.

Crust:

1 cup Pecans
1/3 cup butter
1 cup brown sugar
1/3 cup flour
1 stick lightly salted butter, melted

Peel and cut potatoes into chunks.  Boil potatoes for 30 minutes.  Do not over cook. Drain and let cool for about an hour.

Meanwhile, mix the crust ingredients together and set aside.  It’ll have small clumps.

Preheat oven at  375°F.

Mash the potatoes once they are cooled.  Add the casserole ingredients together with the mashed sweet potatoes.  Mix with a beater for about 4 minutes.  Grease your casserole dish.  (DO NOT add the crust ingredients until after you bake the casserole otherwise your crust will sink into the potatoes.)
Bake the casserole for about 30 minutes.

Add crust to the top, then bake for another 10 minutes.

Serve warm.

My kids are picky eaters but my son had three kid sized helpings of this dish.  It warmed my heart. ♥


Smoked Turkey

Whether you’re making a turkey for Thanksgiving or just any day of the week, this recipe is worth the preparation and work.  I have friends that usually make a ham for Thanksgiving because they’ve never had a turkey worth repeating every year, until they had Thanksgiving at our house last year.  Now they can’t wait to have it again and I can’t wait to get started on it.

I adapted this instruction from my mom’s recipe at  www.offthegardenpath.com.  I informed her that hers was difficult to follow and every time I turned around there was a new ingredient I needed and hadn’t bought because it wasn’t listed at the top where I had gotten my shopping list from. This version here lists everything at the top that you need as well as adapts the recipe for a Large Grill Dome.

This is a complex recipe that requires days of preparation but don’t worry, there’s plenty of down time in between and the outcome is….so worth it!

 If you have any questions, please feel free to comment with your e-mail and/or question and I’ll get back to you as soon as possible.

Shopping List:

22″ WEBER Grill (W)/ or Large Grill Dome (GD)
Coal baskets for indirect heat
Charcoal Briquettes – 10lb. bag will do (I used both mesquite and regular briquettes)
Drip Pan
1  20 oz. galvanized steel can or family size tomato soup can, clean and dried for the pedestal/throne
1  20 lb. turkey (thawed)
Heavy Duty foil
5 gal. clean and disinfected, plastic bucket with a cover
1 apple
1 onion

Brine Ingredients:
5 quarts of water
1 cup of Kosher salt
1 cup of brown sugar
1 large onion, cut into quarters
2 stalks of celery, cut into chunks
3 bay leaves
4 cloves of garlic, sliced into quarters
1 tablespoon of peppercorns or allspice berries
(Most  of the brine recipe was found in ‘Extreme Barbecues’ recipe book by Dan Huntley & Lisa Grace Lednicer.)

The Rub:
Olive Oil
3 tblsp. sea salt
1 tsp. sweet basil
1 tsp. black pepper
1 1/2 tsp. onion powder
1 tsp. garlic powder
2-3 tblsp. steak and meat seasoning
1 tsp. table salt

The “Stuffing”**:  
8 – 10 0z. (about a cup) of chicken broth
2-3 oz. of beer
1 tsp. dried sage leaves
1 bay leaf
1 small onion, cut into quarters,
3 cloves garlic
**This recipe does not give you a traditional edible stuffing byproduct since it’s a smoked turkey. (Stove Top to the rescue!)

The Gravy:
corn starch
chicken bouillon

Preparation twenty-four to thirty-six hours before grilling:

-Prepare/disinfect bucket to hold turkey.

-Thaw turkey well before the day you brine it (Wednesday AM) which is 24 hours before the day you grill it (Thursday AM)(about 3 days in the refrigerator). She’s going to be brining in the refrigerator for a whole day; so make some room in there for it.

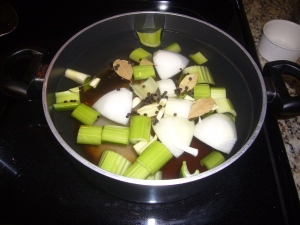
-Mix the brine ingredients in a large pan, stir thoroughly and bring to a boil.

You need a lot of water to cover a 20+lb turkey

Picture 1: You need a lot of water to cover a 20+lb turkey

-Cook for 10 minutes, or until the vegetables are tender.

Evenly distribute the ingredients across your pots

Picture 2: Evenly distribute the ingredients across your pots

-Remove any and all packaging from turkey and rinse the turkey inside and out.
-Place turkey inside the plastic container, strain the brine and pour the broth over the turkey. It should cover the turkey completely. Add more water if it doesn’t.  Leave in the fridge for 24-36 hours.

submerge the gobble gobble

Picture 3: submerge the gobble gobble

Day of Grilling:

Prepare the grill:
You will be using the indirect heat grilling method.
-Remove top grid and place aside.
-Place coal baskets on each side of grill away, on the lower grid and away from the handles.
(W) Fill the coal baskets with 3 lg. pieces of crumpled black and white newspaper.  -Place about 25 briquettes on top of newspaper in each basket.  (You can use a fluid starter if you like; just be careful and follow directions.) It’s good to have heat proof oven mitts or fire gloves on hand and a water bottle sprayer just in case.

NOTE:  You may also use soaked wood chips in your coal baskets along with the briquets
-Adjust your air vents accordingly.
*Because the Weber has an adjustable vent control;  check beforehand and mark the half-way opening setting and the fully opened setting.  Use the fully opened setting when you first light the fire and start grilling.  Close it down to halfway about a half an hour into grilling once you have a good fire going.

-(GD) Heat the smoker up to 275 °F, adjust air vents as needed.  My husband is known as Uncle Gadget so he has all sorts of thingamajiggers on his smoker to control the temperature.
Ready to Grill:

-Rinse the turkey after 24-36 hours of brining, in cold water.
-In the 20 oz. can (or Throne), add your “stuffing” ingredients: chicken broth, beer, dried sage leaves, bay leaf, onion, garlic cloves.

ready to shove this up the turkey's tookus?

Picture 4: ready to shove this up the turkey’s tookus?

-Mix with a spoon.
-Put the filled can in the drip pan (a sturdy, old metal cake pan will do. Make sure it has some depth to hold the juices).
-Place the bird on the can through the area you would normally stuff with dressing.
–The legs should be facing downward so the bird looks like he’s dancing.

With the Turkey sitting on the can, you can give her the rub down without missing a spot

Picture 5: Everybody was Kung Fu fighting.

-Rub the bird all over with olive oil.
-Combine rub ingredients in a bowl.

this amount should cover a 22 lb turkey

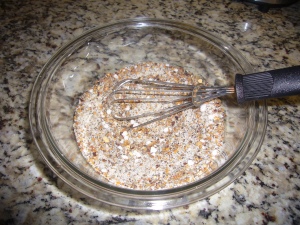
Picture 6: this amount should cover a 22 lb turkey

-Rub the dry rub all over the bird; being careful not to spill the contents of the can.
-Cover the drumsticks with heavy duty foil to prevent over-cooking.

This will keep the legs from becoming charcoal

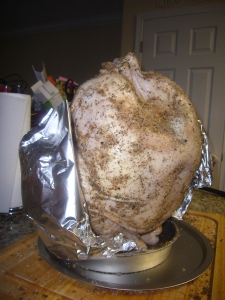
Picture 7: This will keep the legs from becoming charcoal

-Cut an apple and an onion in half
-Place them inside the top of the bird to hold the steam and flavors in.

This keeps the inside moist and full of flavor from the can.  What a lucky turkey!

Picture 8: This keeps the inside moist and full of flavor from the can. What a lucky turkey!

-Place the bird and can with the drip pan on (W) the bottom grid between the two coal baskets.  (GD) on a pizza tin pan (see picture 5) then in the center of the smoker to give sturdiness and even heating in the smoker.

She's ready to smoke!  mmmmmm, I can almost taste the Thanksgiving turkey now!

She’s ready to smoke! mmmmmm, I can almost taste the Thanksgiving turkey now!

(W) Adjust your vents for full opening for the first 1/2 to 1 hour; then close to 1/2 way.
(W) Replace the grill cover and open the vents completely throughout the cooking process.
-The inner temperature of the bird, when finished, should be about 160°F. It will continue to cook to proper temperature while ‘resting’. You can check the temperature after an hour and a half by place a good thermometer in the turkey just above the drumstick. It should read 160°F.
-Carefully remove the drip pan, can, and turkey together.  You will probably need more than two protected hands to do this.
-Remove the can without spilling the contents and place the turkey in a 9×13 pan or dish. The turkey will sit in the juices while ‘resting’.  The longer it sits, the better it will taste.

Her color is PERFECT!

Her color is PERFECT!

Tips and Tricks for the Weber:
Set your timer for an hour to ‘replenish the briquets’. You want to maintain an even temperature, so don’t keep peeking at the bird to see if it’s done.  Optimum temp at 275°F.
For the 14 lb. turkey, it took only 2 hours or less to cook thoroughly.  A 20 lb turkey takes about 3 1/2 hours.  The meat will be pinkish looking due to the ‘smoking’.

The Gravy:
Mix together corn starch and water until you get a thick liquid.  (Proportions will be 4 parts water, 1 part corn starch)
Take the juices from the turkey and strain them into a pan, add 1-2 bouillons and bring to a boil.  Slowly whisk in the corn starch mixture to thicken up the gravy.  Do not feel you need to use it all, just enough to reach your desired consistency. Continue to boil for 10 minutes whisking frequently.

Christmas Ornament Characters

Since becoming a SAHM, I’ve had to learn to budget better than I once did.  This means Christmas gifts for family members requires imagination and creativity.  I’ve come to the conclusion, I am not very creative but I also know a great not-so-well-kept secret called Pinterest.  People out there are so darn creative, it makes me sick and happy at the same time.

I settled on making Christmas ornaments and went to town on Pinterest looking for some ideas on how to make them.  I came across some glass ornament characters that I thought were really cute and simple enough, so I dove in further and clicked on the website.  Imagine my disappointment when I found just an image of the homemade ornament and not a step by step tutorial.  Sad face.  I wondered if I was creative enough to figure it out myself and decided I needed my box of goodies to get me started. 

Here’s what I found what I needed to create the characters, Frosty, Rudolph, Elf, and Santa:

Santa, Frosty, The Elf, and Rudolph made GREAT gifts for teachers, family members and friends

Santa, Frosty, The Elf, and Rudolph made GREAT gifts for teachers, family members and friends

glass ornaments
glitter
posterboard
pipe cleaner
clear Elmer’s glue
hot glue gun
paint brush
a kid free environment
wiggly eyes

First I took out the stem of the glass ornaments.  Next I had my handy dandy husband put together a mixture of clear Elmer’s glue and water.  The mixture needed to be liquid enough to coat the inside of the glass ornament but thick enough to stick to it and not run off completely. 

The goo

After the mixture was just right in consistency, I poured alittle into the clean glass ornament.

Coat the entire inside of the glass ornament by swirling it around.  An even coat is best for this type of project.

Coat the entire inside of the glass ornament by swirling it around. An even coat is best for this type of project.

Once I had an even coat, I laid the ornament upside down over the glue container to let any excess glue drip out.  This is very important because otherwise you end up with runny glitter clumps once you add glitter to the ornament.

Let ALL the excess glue drain out before continuing on to the next step.

Let ALL the excess glue drain out before continuing on to the next step.

Meanwhile, while you are waiting for the excess glue to drip out, you can gather your ornament decorations that you will be gluing to the outside of the ornament to create the character.  Using scissors or better yet, your Silouette (which I do not have), cut out the buckle to the belt for the elf and Santa, the belts and the little booties for the elf. 

Using your glue mixture you can  paint some glue onto the buckle cut out and sprinkle glitter over the top to add some sparkle and pizazz to their outfits.

paint with glue, then add glitter.  Let dry!

paint with glue, then add glitter. Let dry!

I also used a hole punch and foam stickers to make buttons and Frosty’s mouth.

Foam sticker sheets and a hole punch.

Foam sticker sheets and a hole punch.

Once all the excess glue has dripped out, pour about a tablespoon of glitter into the glass ornament.  I used, though I do not have a photo to show it, a paper cone that I taped together to funnel the glitter into the ornament “neatly”.

pour glitter into the glass ornament using a homemade paper cone or the container it came in.

pour glitter into the glass ornament using a homemade paper cone or the container it came in.

Completely coat the inside of the ornament with glitter

Evenly coat the inside with glitter,

Evenly coat the inside with glitter,

Once you have an even coat of glitter, tip the open end of the ornament over a cup or dish to drain out excess glitter.

excess glitter be gone

Next, it’s time to decorate and make them your own!  I used SMALL amounts of hot glue to add the eyes, nose, buttons, belts, stockings and mouths to the ornaments.  If you don’t have a hot glue gun, no worries, use regular glue.  I also had foam stickers on hand, that I used to add small items to the ornaments so you could always go that route. 

I used three dots of hot glue to add the belts to the glass ornaments.  I was too afraid of cracking the glass to use any more than that.

I used three dots of hot glue to add the belts to the glass ornaments. I was too afraid of cracking the glass to use any more than that.

hot glue them babies!

I realize this ornament is green.  I hadn’t planned on blogging about my ornaments until too late so I had to start taking pictures mid-ornament and then start a new one to get you the instructions on the glitter since there weren’t any out there in Pinterest world.  One blog suggested using Mop-Glo as the tacky substance on the inside of the ornament.  If it works for you, let me know!

So are you ready to see some up close finished products?  Here ya go!

Santa Baby

Santa Baby

One of my favorite ornaments but a pain in the butt without a Silouette machine.

One of my favorite ornaments but a pain in the butt without a Silouette machine.

Frosty, The Snowman! (no button nose, sorry)

Frosty, The Snowman! (no button nose, sorry)

The Red Nose Reindeer

The Red Nose Reindeer

I was so excited when I finished these adorable ornaments.  I can’t believe I made these all by myself!  This year, now that I know what I’m doing, I may let the kids “help” me with these.

Fool Proof Homemade Pizza Crust

When my husband and I moved back to the states, we invested in a pizza stone.  With it, came a pizza crust recipe that we have found to be fool proof.  Over the last two years we have tweaked it to become our own go to version.  The original crust recipe is Emile Henry’s.

Ingredients:

3 cups flour
2 tsp sugar
1 tsp salt
2 1/4 tsp or one package dry active yeast
1 cup luke warm water
2 Tbsp olive oil
corn meal

First off, preheat your oven to 500°F with the pizza stone placed on one of the low racks.  Once the oven is preheated, let it sit an additional 20 minutes to heat up your pizza stone.  Proof the yeast by adding the yeast and ONE tsp sugar to the cup warm water.  Stir until dissolved.
Next, whisk together flour, ONE tsp sugar and salt in the mixing bowl.
In the KitchenAid mixer using the dough hook, add the yeast/water mixture slowly to the flour while it is stirring (Setting 3).  Next add the olive oil and let the dough hook do it’s thing for about 4-5 minutes.  If you find the dough not becoming one big ball and little pieces stay at the bottom of the bowl, add just a few drops of warm water at a time until it reaches your desired consistency.

Let the dough sit in the bowl for thirty minutes covered with a towel.  After thirty minutes, split the dough in half and set both halves on a floured surface, cover for another thirty minutes.
Take one ball of dough and press it out onto a floured surface until it is the size and shape you want for your crust.  Pick up the pressed out dough and place it on a pizza peel or flat cookie sheet that has been floured and sprinkled with corn meal.

Add your sauce, cheese and ingredients to finish off your pizza.  Slide your pizza onto the hot pizza stone and let bake in the oven for 6-7 minutes.  Take the pizza out and place it on a cutting board, cut and enjoy!

My favorite ingredients to top my pizza are:  Bob Evans sausage (sage) (pre-cooked), fresh cut up spinach, chopped tomatoes and feta cheese.  YUM!

Last Minute Baby Shower

A baby shower dropped kersplat right into my lap.  One week to get something put together for a new mommy.  And I’m a sucker for a new mommy.  It’ll be her first baby shower and unfortunately, her husband is deployed and won’t be able to partake in it.  Double sucker.  There’s nothing like a mommy-to-be to bring out my nurturing, protective, let me give you everything that I have to help you get through this mode.

So there I was, scouring the internet for ideas on what to do.  It’s supposed to be a low-key shower and the venue is in a very popular, cluttered restaurant.  The first thing I came across was this easy diaper cake tutorial from Slap Dash Mom.

This was just the first thing I came across.  It’s going to be perfect for her!  Next, I need to work on games that I can do in this popular restaurant.  I’m thinking String-Around-The-Mommy, The Don’t Say “Baby” and the Dirty Diaper games  Any other suggestions?  What about prizes for a co-ed baby shower?

Update:  Here is my version of this awesomely easy diaper cake.

Milk Jug Pumpkins

I saw this craft on pinterest and decided it would a great CHEAP Halloween decoration that I can make with the kids. I also included pictures on how to do it rather than just the final  product.

My kids are not the best artists which totally goes against my need for perfection in crafts.  I hate myself for always wanting to straighten out a line here or there, or make sure the right colored crayon colors the right object. Trust me, it takes every ounce of restraint for me not to do my daughter’s Pre-K homework for her.  My hands just itch to intervene her “artwork”.  I’ll admit though, she’s getting better at staying in the lines, which is why I let her do up a milk jug pumpkin of her own.  Sadly, my OCD got the best of me when she had lost interest and I “finished” it up in order for it to be on display at our house.  😦  I know, I know.  Bad Mommy.

Items that you will need for this craft:
gallon milk jugs.  (Empty and clean.  Your choice as to the quantity.  I started collecting them at the end of August to get 10 jugs)
Permanent black marker
Knife
Duct or Packing Tape
String of Christmas lights (your choice in color.  I chose orange to make them look more Halloweenish but I’m sure colored or white look just as nice)

Step 1:
Be sure to have your milk jugs cleaned out prior to saving them so when you finally go to start this project, you’re not knocked unconscious by the fumes of the spoiled milk dregs at the bottom of the milk jugs that you’ve been saving for months.  (I THOUGHT I had been cleaning them out all along)

Step 2:
Peel off the stickers.  I figured this was something easy for my kids to do but I totally lost them after 4 minutes and 18 seconds.  Oh well.

Step 3: 
Using the black permanent marker, draw your pumpkin faces.

Step 4:
Take off the safety ring under the cap.

Step 5:
Color the whole cap with your black marker

Step 6:
Cut a 1-2″ hole in the back of the jug near the bottom

Step 7:
Tape the milk jugs together

Step 8:
Insert lights into the holes on the back of the jug, evenly distributing them through all the jugs.

Step 9: 
Place the line of jugs upside down and tape them together on the under side to keep them together better.

Step 10:
Light em up!

The one thing I’m not quite sure about is storing these for next year.  They seem kind cumbersome.  Got any ideas?

How do you like your chicken wings?

We do chicken wings right where I’m from.  And just to prove it, I’ll offer up my favorite chicken wing recipe for you to taste for yourself.  I’d invite you over to my house but we devoured the plate of wings already so it’s up to you to make these fantastically hot wings for yourself.

Ingredients:
24 Chicken Wings thawed
Garlic Powder
Salt
1 Cup Frank’s Hot Sauce
2 Tbsp Butter
3 Tbsp Maple Syrup
1 Tbsp Molasses
2 tsp honey

  1. Preheat oven to 375°F
  2. Grease up your baking sheet (I cover mine with aluminum foil to avoid ruining my baking sheet but that’s just personal preference)
  3. Lay your chicken wings in a single layer on the baking sheet
  4. Sprinkle garlic powder and salt over the wings, flip then repeat.
  5. Stick in the oven for 30 minutes.
  6. While the wings are baking, grab a small saucepan and on a medium heat, dump in the Frank’s Hot Sauce and butter. Stir with a whisk.  I should warn you here that I don’t use measuring devices.  I just wing it.  Get it?  Wing it.  Ha ha ha. I crack myself up.  Anywho.
  7. Once the butter is melted, add the molasses, syrup and honey in no particular order.
  8. Stir sauce over medium heat and let the flavors come together.  Feel free to taste test and add more or less of the ingredients to fit your needs.  My husband suggests adding a few drops of jalapeno juice to create a different level of spicy in your sauce.
  9. Once you get the sauce to a flavor you can live with, drop the temperature down to Low and let it thicken up.  Continue to stir the sauce occasionally so not to burn.
  10. After 30 minutes, flip the chicken wings over and return to the oven for 15 minutes.
  11. After 15 minutes, pull the chicken wings out of the oven and brush on the sauce. 
  12. Flip the wings over again and brush the other side.
  13. Return to the oven for another 15 minutes. 
  14. Any remaining sauce can be used to dip your wings in for extra heartburn fun later.  Just kidding.

Remove wings from the oven, serve up on a plate and enjoy with your favorite dipping sauce if you so choose.

A word of caution:  Try as you might to wash your hands clean after eating your wings, the sauce will somehow still be on your fingers or toes depending on how you eat.  DO NOT, I repeat, DO NOT touch your eyes, or for you men, your peckers, because you will pay.  Trust me on this one.

Tongue Tied Grilled Cheese


Ingredients:

Habanero Jack Cheese
2 slices of bread
1/2 Avocado
Butter, margarine or Olive Oil Mayonaisse
Favorite seasoning

Optional:  2 slices of bacon

1. Butter up one side of each slice of bread.  I enjoy a thick piece of bakery fresh bread from the local grocery store for my grilled cheese sandwiches.

2. Slice up your cheese to be as thin or as thick as you want it.

3. Lay your cheese on the unbuttered side of your bread.

4. Slice your avocado and lay it on top of the cheese.  (if including bacon, add it here)

5. Sprinkle with your favorite seasoning.  Mine is Tastefully Simple’s Seasoned Salt.  Do not over do it!

6. Place your loaded slice of bread on the griddle or frying pan

7. Lay the other slice of bread on top with the butter side facing out.

8. Brown both sides of your grilled cheese sandwich to desired color but be sure to melt your cheese in the process.

9. Remove from heat and enjoy.

Money Making Adult Halloween Costume

Did it ever occur to you to make your own Halloween costume this year?  I mean, those awesome Princess Leia costumes can cost you a pretty penny not to mention the imminent wardrobe malfunction that should follow.

YOWZAS! 


So why not put your wallet away and try this costume on for size?

This costume idea will cost you next to nothing to make and what’s even better is, you can make money at your party with it. I made enough money in this costume to buy a tank of gas for my gas guzzling 76 Chevy Nova.  I’m sure with a larger party than what I went to, you could make much more money than I did.

Materials needed:

  • A large box that is big enough to go around your mid section.
  • Gift Wrap (hearts or something pink worked for me)
  • 4 gift wrap tubes
  • Flat piece of cardboard to make your sign
  • White paper to cover the piece of cardboard
  • Markers
  • Clear tape (for gift wrapping) and Duct Tape (for keeping your costume together)
  • 2 White ribbons, at least 3″ wide and each long enough to go over your shoulders and still secure down to the underside of the front flap and the back flap.
  • Pockets or cleavage to put your money (I opted for pockets that year)

How to Make Your Kissing Booth:

  1. Cut the flaps of the box so that there is about 3″ left of each flap.
  2. Gift wrap the box on the outside to include the 3″ flaps using clear tape.
  3. Cut 2 holes in the front flap and 2 in the back flap on each end.  Gift wrap tubes should fit tight into the holes.
  4. Split the bottom of the gift wrap tubes so that once they are through the holes made in Step 3, you can fan them out on the underside of the flaps and tape them down.
  5. Wrap or decorate the tubes
  6. Insert the tubes through the holes, fan them out as indicated in Step 4 and tape them down.
  7. Secure one end of the 2 white ribbons to the front flap, just less than shoulder length apart.  Do this to the back flap with the other end of the ribbon.  Remember this ribbon will have to hold up the box on your body otherwise you’re going to be holding it up yourself all night.
  8. Decorate the flat piece of cardboard with white paper and write Kissing Booth and name your price.
  9. Tape your Kissing Booth sign to the gift wrap tubes using duct tape, bending the ones in the back to meet the ones in the front.
  10. Put on a cute skirt and ruffly shirt to wear under your booth, sweeten up your make up and put on some lips for heavens sake!  You’re going to be kissing A LOT of people so keep that lipstick handy!  (The redder the better!)
  11. Shimmy yourself into your kissing booth and go to town.


Have a fabulous night, take pictures and share them with me!  I’d love to see you in your costumes!


5 Minute Christmas Bows That Will Save You $$

When I was 15, I accompanied my mother to work during Christmas break.  My mother worked at a garden nursery.  It was Christmas time and the place was DECKED out top to bottom with Christmas decorations.  All over the trees and railings were these beautiful bows that my mom proudly told me she had made.  She took me upstairs to the loft and showed me the tables full of ribbon, wire, and scissors.  There were examples of bows in all shapes and sizes all over the place.  She showed me how to make the bows and whenever a customer wanted one made to match the size of another, I would whip these gorgeous bows together in 5 minutes.

The most popular bow is the one I’m about to show you:

bows, holiday decorations, DIY bows, Christmas

               Learn how to make these beautiful bows and save yourself $30!

What you need:
Roll of ribbon, preferably with wire in the edges (best selection of ribbons can be found at most craft stores)
wire sticks (though I’ve used twist ties in a pinch)
scissors

scissors, wire, ribbon

I bought the ribbon from Walmart (craft section)for $3.57 and the bag of wire (floral section) for $1.00 (for 30 pieces).

Step 1: Roll the end of the ribbon so the end is under your thumb and you have a circle and a half, as shown below.

                                Step 1

Step 2:  Twist the tail to make the first loop

                             Step 2

Step 3:  Finish your first loop by twisting the ribbon in the center where your fingers pinch together to hold the bow in place.  You will make your second loop of the same size, across from the first.

                              Step 3

   Here’s a look at the back of Step 3

Step 4: Make your second loop and twist the end again between your pinched fingers.

                                Step 4

Step 5:  Repeat this until you have 3 loops on one side.  This will be your first tier.

            One Tier = 3 Sets of Loops

Step 6:  Make a fourth loop that is larger than the first 3.

                                Step 6

Step 7:  Repeat steps 3 through 5 with the larger loops, completing the second tier.

 Step 7: 3 Smaller Loops, 3 Bigger Loops

Step 8:  Take the tail and bring it up between your fingers and pinch it together with the rest of the ribbon.  You will now have this short tail and a longer loop that will become two additional tails later.

                       Step 8

Step 9:  Insert the wire into the center single loop.  (The first one that you made.) 

                    Step 9

Step 10:  Bend the wire and twist together tightly to hold the ribbon in place.

                      Step 10

Step 11:  Take the long looped tail and cut it in half so there is two tails and no longer a large loop.

                               Step 11

Step 12:  Fold one tail in half.

                               Step 12

Step 13:  Cut from the material side down to the wire end of the ribbon to make a “V”.  Repeat with the other two tails.  This will make your bow have a finished look.

                              Step 13

Step 14:  Fluff and shape your bow to achieve it’s fullness as seen in the first photo.  Having wire in your ribbon will help you manipulate the bow into a shape that stays put.

                       Step 14

Step 15:  Decorate with your bow by attaching it to a wreath or garland using the wire stick. 


The best part about these bows is that you can store them in a box, crush them to fit in with the rest of your stored decorations and the next time you pull them out, you can reshape them and they will look like new!

While I used Christmas ribbon, you can make these bows for any occasion by using a different colored ribbon.  I also made the following bow today but my photos didn’t turn out as clear as I had hoped.

                   Another bow I made but my photographer had to be fired.