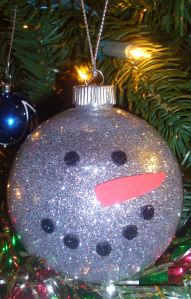
Since becoming a SAHM, I’ve had to learn to budget better than I once did. This means Christmas gifts for family members requires imagination and creativity. I’ve come to the conclusion, I am not very creative but I also know a great not-so-well-kept secret called Pinterest. People out there are so darn creative, it makes me sick and happy at the same time.
I settled on making Christmas ornaments and went to town on Pinterest looking for some ideas on how to make them. I came across some glass ornament characters that I thought were really cute and simple enough, so I dove in further and clicked on the website. Imagine my disappointment when I found just an image of the homemade ornament and not a step by step tutorial. Sad face. I wondered if I was creative enough to figure it out myself and decided I needed my box of goodies to get me started.
Here’s what I found what I needed to create the characters, Frosty, Rudolph, Elf, and Santa:
glass ornaments
glitter
posterboard
pipe cleaner
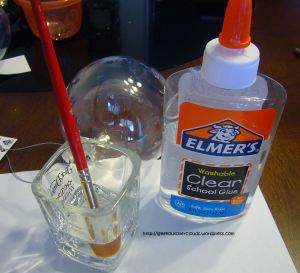
clear Elmer’s glue
hot glue gun
paint brush
a kid free environment
wiggly eyes
First I took out the stem of the glass ornaments. Next I had my handy dandy husband put together a mixture of clear Elmer’s glue and water. The mixture needed to be liquid enough to coat the inside of the glass ornament but thick enough to stick to it and not run off completely.
After the mixture was just right in consistency, I poured alittle into the clean glass ornament.

Coat the entire inside of the glass ornament by swirling it around. An even coat is best for this type of project.
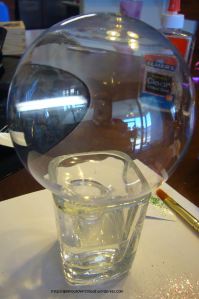
Once I had an even coat, I laid the ornament upside down over the glue container to let any excess glue drip out. This is very important because otherwise you end up with runny glitter clumps once you add glitter to the ornament.
Meanwhile, while you are waiting for the excess glue to drip out, you can gather your ornament decorations that you will be gluing to the outside of the ornament to create the character. Using scissors or better yet, your Silouette (which I do not have), cut out the buckle to the belt for the elf and Santa, the belts and the little booties for the elf.
Using your glue mixture you can paint some glue onto the buckle cut out and sprinkle glitter over the top to add some sparkle and pizazz to their outfits.
I also used a hole punch and foam stickers to make buttons and Frosty’s mouth.
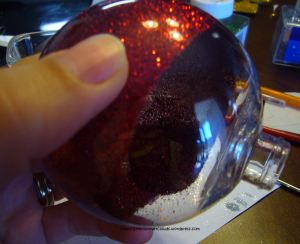
Once all the excess glue has dripped out, pour about a tablespoon of glitter into the glass ornament. I used, though I do not have a photo to show it, a paper cone that I taped together to funnel the glitter into the ornament “neatly”.
Once you have an even coat of glitter, tip the open end of the ornament over a cup or dish to drain out excess glitter.
Next, it’s time to decorate and make them your own! I used SMALL amounts of hot glue to add the eyes, nose, buttons, belts, stockings and mouths to the ornaments. If you don’t have a hot glue gun, no worries, use regular glue. I also had foam stickers on hand, that I used to add small items to the ornaments so you could always go that route.

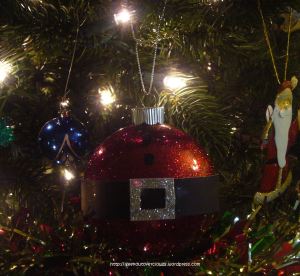
I used three dots of hot glue to add the belts to the glass ornaments. I was too afraid of cracking the glass to use any more than that.
I realize this ornament is green. I hadn’t planned on blogging about my ornaments until too late so I had to start taking pictures mid-ornament and then start a new one to get you the instructions on the glitter since there weren’t any out there in Pinterest world. One blog suggested using Mop-Glo as the tacky substance on the inside of the ornament. If it works for you, let me know!
So are you ready to see some up close finished products? Here ya go!
I was so excited when I finished these adorable ornaments. I can’t believe I made these all by myself! This year, now that I know what I’m doing, I may let the kids “help” me with these.

