How do you like your chicken wings?

We do chicken wings right where I’m from.  And just to prove it, I’ll offer up my favorite chicken wing recipe for you to taste for yourself.  I’d invite you over to my house but we devoured the plate of wings already so it’s up to you to make these fantastically hot wings for yourself.

Ingredients:
24 Chicken Wings thawed
Garlic Powder
Salt
1 Cup Frank’s Hot Sauce
2 Tbsp Butter
3 Tbsp Maple Syrup
1 Tbsp Molasses
2 tsp honey

  1. Preheat oven to 375°F
  2. Grease up your baking sheet (I cover mine with aluminum foil to avoid ruining my baking sheet but that’s just personal preference)
  3. Lay your chicken wings in a single layer on the baking sheet
  4. Sprinkle garlic powder and salt over the wings, flip then repeat.
  5. Stick in the oven for 30 minutes.
  6. While the wings are baking, grab a small saucepan and on a medium heat, dump in the Frank’s Hot Sauce and butter. Stir with a whisk.  I should warn you here that I don’t use measuring devices.  I just wing it.  Get it?  Wing it.  Ha ha ha. I crack myself up.  Anywho.
  7. Once the butter is melted, add the molasses, syrup and honey in no particular order.
  8. Stir sauce over medium heat and let the flavors come together.  Feel free to taste test and add more or less of the ingredients to fit your needs.  My husband suggests adding a few drops of jalapeno juice to create a different level of spicy in your sauce.
  9. Once you get the sauce to a flavor you can live with, drop the temperature down to Low and let it thicken up.  Continue to stir the sauce occasionally so not to burn.
  10. After 30 minutes, flip the chicken wings over and return to the oven for 15 minutes.
  11. After 15 minutes, pull the chicken wings out of the oven and brush on the sauce. 
  12. Flip the wings over again and brush the other side.
  13. Return to the oven for another 15 minutes. 
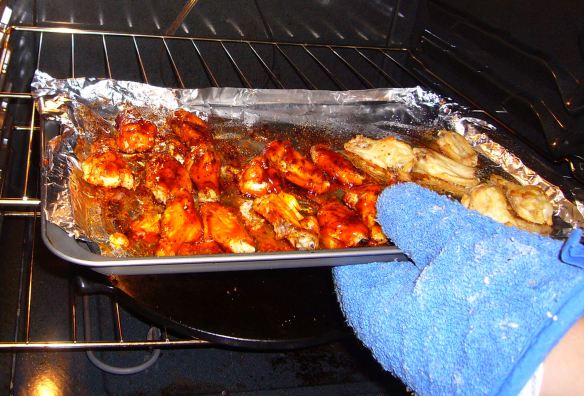
  14. Any remaining sauce can be used to dip your wings in for extra heartburn fun later.  Just kidding.

Remove wings from the oven, serve up on a plate and enjoy with your favorite dipping sauce if you so choose.

A word of caution:  Try as you might to wash your hands clean after eating your wings, the sauce will somehow still be on your fingers or toes depending on how you eat.  DO NOT, I repeat, DO NOT touch your eyes, or for you men, your peckers, because you will pay.  Trust me on this one.

Mud’s Mudslides


Ingredients:

1 1/2 cup uncrushed ice
1 – sliced up Banana
1- shot of Kahlua
1- shot of Baileys
1 – shot of Grey Goose Vodka
2 – shots of milk
2 – shots of Vanilla Creamer
Hershey’s Plain Chocolate bar (quantity depends on preference)

Combine ice and banana in a blender. 
Then add all liquids. 
Blend until texture is smooth. 
Pour into glass. 
Shave chocolate on top. 
Enjoy.
Repeat process until you’re happy and you know it.

Tongue Tied Grilled Cheese


Ingredients:

Habanero Jack Cheese
2 slices of bread
1/2 Avocado
Butter, margarine or Olive Oil Mayonaisse
Favorite seasoning

Optional:  2 slices of bacon

1. Butter up one side of each slice of bread.  I enjoy a thick piece of bakery fresh bread from the local grocery store for my grilled cheese sandwiches.

2. Slice up your cheese to be as thin or as thick as you want it.

3. Lay your cheese on the unbuttered side of your bread.

4. Slice your avocado and lay it on top of the cheese.  (if including bacon, add it here)

5. Sprinkle with your favorite seasoning.  Mine is Tastefully Simple’s Seasoned Salt.  Do not over do it!

6. Place your loaded slice of bread on the griddle or frying pan

7. Lay the other slice of bread on top with the butter side facing out.

8. Brown both sides of your grilled cheese sandwich to desired color but be sure to melt your cheese in the process.

9. Remove from heat and enjoy.

Money Making Adult Halloween Costume

Did it ever occur to you to make your own Halloween costume this year?  I mean, those awesome Princess Leia costumes can cost you a pretty penny not to mention the imminent wardrobe malfunction that should follow.

YOWZAS! 


So why not put your wallet away and try this costume on for size?

This costume idea will cost you next to nothing to make and what’s even better is, you can make money at your party with it. I made enough money in this costume to buy a tank of gas for my gas guzzling 76 Chevy Nova.  I’m sure with a larger party than what I went to, you could make much more money than I did.

Materials needed:

  • A large box that is big enough to go around your mid section.
  • Gift Wrap (hearts or something pink worked for me)
  • 4 gift wrap tubes
  • Flat piece of cardboard to make your sign
  • White paper to cover the piece of cardboard
  • Markers
  • Clear tape (for gift wrapping) and Duct Tape (for keeping your costume together)
  • 2 White ribbons, at least 3″ wide and each long enough to go over your shoulders and still secure down to the underside of the front flap and the back flap.
  • Pockets or cleavage to put your money (I opted for pockets that year)

How to Make Your Kissing Booth:

  1. Cut the flaps of the box so that there is about 3″ left of each flap.
  2. Gift wrap the box on the outside to include the 3″ flaps using clear tape.
  3. Cut 2 holes in the front flap and 2 in the back flap on each end.  Gift wrap tubes should fit tight into the holes.
  4. Split the bottom of the gift wrap tubes so that once they are through the holes made in Step 3, you can fan them out on the underside of the flaps and tape them down.
  5. Wrap or decorate the tubes
  6. Insert the tubes through the holes, fan them out as indicated in Step 4 and tape them down.
  7. Secure one end of the 2 white ribbons to the front flap, just less than shoulder length apart.  Do this to the back flap with the other end of the ribbon.  Remember this ribbon will have to hold up the box on your body otherwise you’re going to be holding it up yourself all night.
  8. Decorate the flat piece of cardboard with white paper and write Kissing Booth and name your price.
  9. Tape your Kissing Booth sign to the gift wrap tubes using duct tape, bending the ones in the back to meet the ones in the front.
  10. Put on a cute skirt and ruffly shirt to wear under your booth, sweeten up your make up and put on some lips for heavens sake!  You’re going to be kissing A LOT of people so keep that lipstick handy!  (The redder the better!)
  11. Shimmy yourself into your kissing booth and go to town.


Have a fabulous night, take pictures and share them with me!  I’d love to see you in your costumes!


5 Minute Christmas Bows That Will Save You $$

When I was 15, I accompanied my mother to work during Christmas break.  My mother worked at a garden nursery.  It was Christmas time and the place was DECKED out top to bottom with Christmas decorations.  All over the trees and railings were these beautiful bows that my mom proudly told me she had made.  She took me upstairs to the loft and showed me the tables full of ribbon, wire, and scissors.  There were examples of bows in all shapes and sizes all over the place.  She showed me how to make the bows and whenever a customer wanted one made to match the size of another, I would whip these gorgeous bows together in 5 minutes.

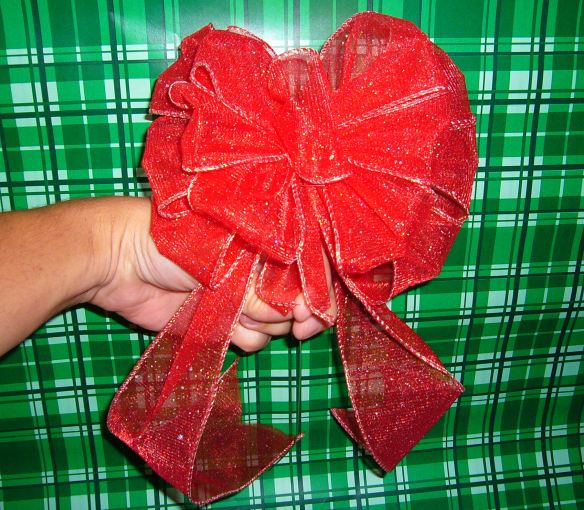
The most popular bow is the one I’m about to show you:

bows, holiday decorations, DIY bows, Christmas

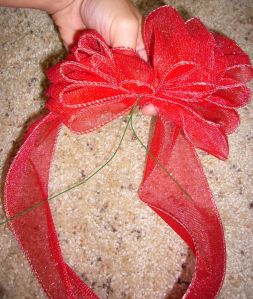
               Learn how to make these beautiful bows and save yourself $30!

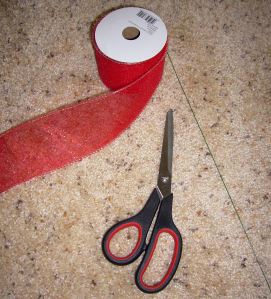
What you need:
Roll of ribbon, preferably with wire in the edges (best selection of ribbons can be found at most craft stores)
wire sticks (though I’ve used twist ties in a pinch)
scissors

scissors, wire, ribbon

I bought the ribbon from Walmart (craft section)for $3.57 and the bag of wire (floral section) for $1.00 (for 30 pieces).

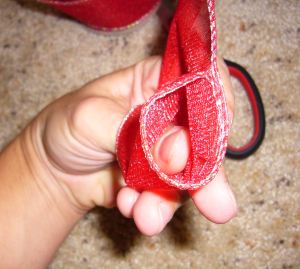
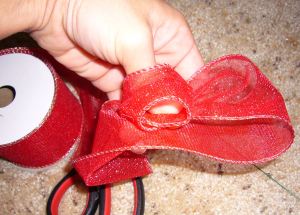
Step 1: Roll the end of the ribbon so the end is under your thumb and you have a circle and a half, as shown below.

                                Step 1

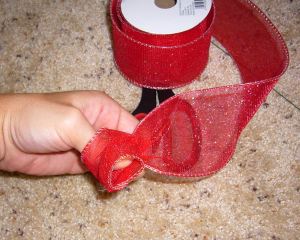
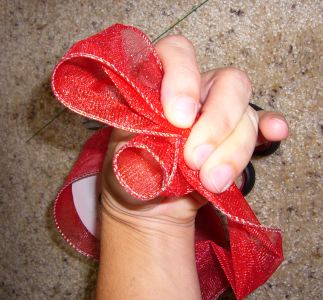
Step 2:  Twist the tail to make the first loop

                             Step 2

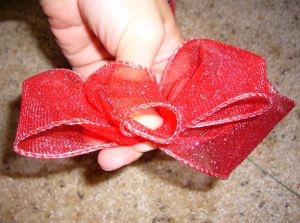
Step 3:  Finish your first loop by twisting the ribbon in the center where your fingers pinch together to hold the bow in place.  You will make your second loop of the same size, across from the first.

                              Step 3

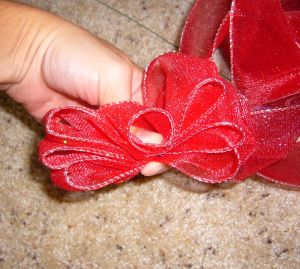
   Here’s a look at the back of Step 3

Step 4: Make your second loop and twist the end again between your pinched fingers.

                                Step 4

Step 5:  Repeat this until you have 3 loops on one side.  This will be your first tier.

            One Tier = 3 Sets of Loops

Step 6:  Make a fourth loop that is larger than the first 3.

                                Step 6

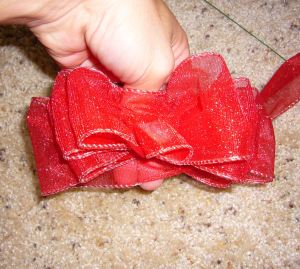
Step 7:  Repeat steps 3 through 5 with the larger loops, completing the second tier.

 Step 7: 3 Smaller Loops, 3 Bigger Loops

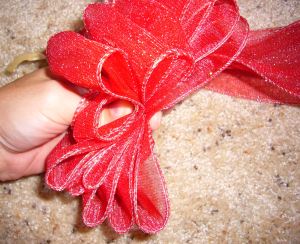
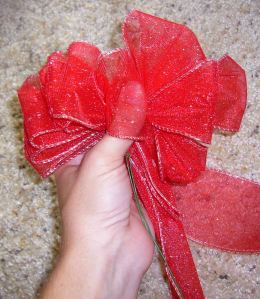
Step 8:  Take the tail and bring it up between your fingers and pinch it together with the rest of the ribbon.  You will now have this short tail and a longer loop that will become two additional tails later.

                       Step 8

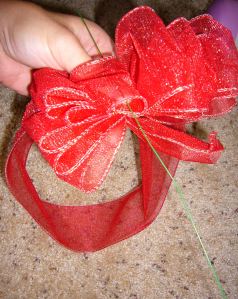
Step 9:  Insert the wire into the center single loop.  (The first one that you made.) 

                    Step 9

Step 10:  Bend the wire and twist together tightly to hold the ribbon in place.

                      Step 10

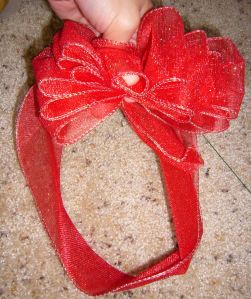
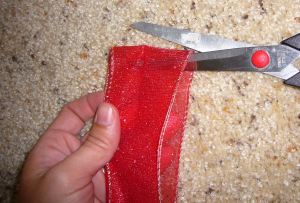
Step 11:  Take the long looped tail and cut it in half so there is two tails and no longer a large loop.

                               Step 11

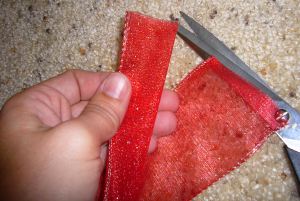
Step 12:  Fold one tail in half.

                               Step 12

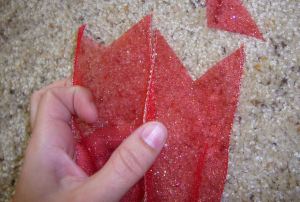
Step 13:  Cut from the material side down to the wire end of the ribbon to make a “V”.  Repeat with the other two tails.  This will make your bow have a finished look.

                              Step 13

Step 14:  Fluff and shape your bow to achieve it’s fullness as seen in the first photo.  Having wire in your ribbon will help you manipulate the bow into a shape that stays put.

                       Step 14

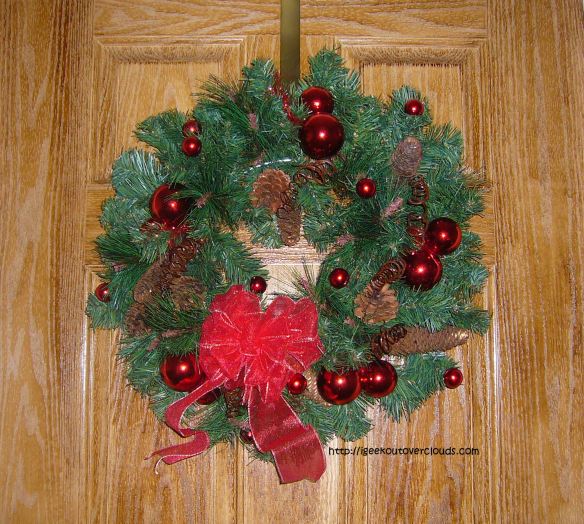
Step 15:  Decorate with your bow by attaching it to a wreath or garland using the wire stick. 


The best part about these bows is that you can store them in a box, crush them to fit in with the rest of your stored decorations and the next time you pull them out, you can reshape them and they will look like new!

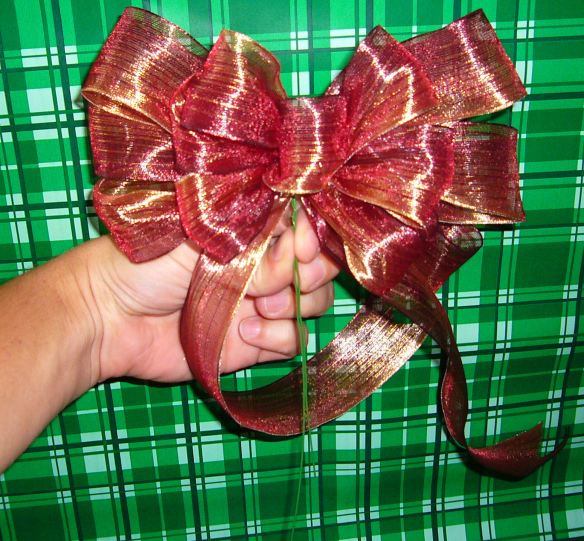
While I used Christmas ribbon, you can make these bows for any occasion by using a different colored ribbon.  I also made the following bow today but my photos didn’t turn out as clear as I had hoped.

                   Another bow I made but my photographer had to be fired.